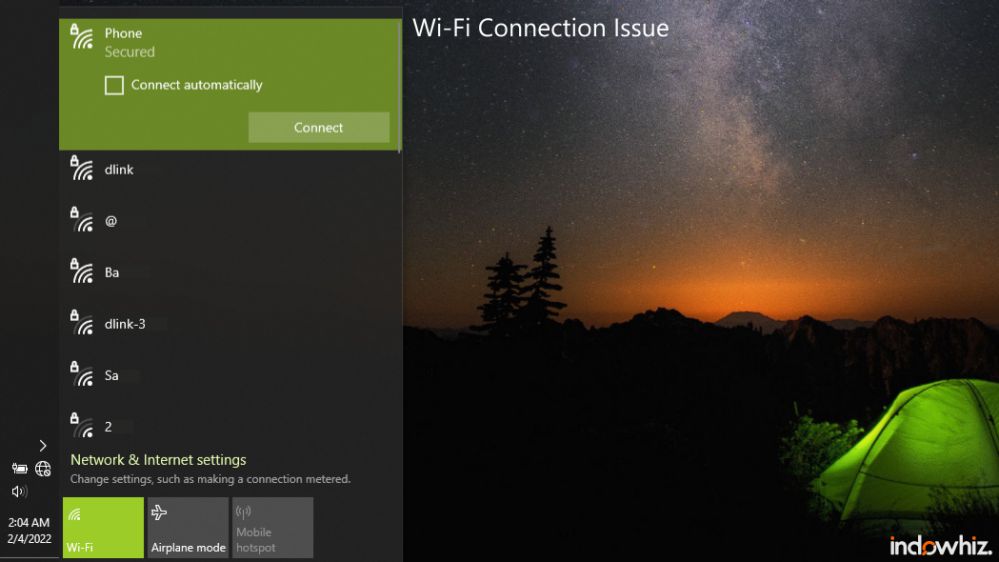
Connecting your computer to the internet is common nowadays. But, sometimes, you may have issues connecting your windows to the network. One of the issues you could face is “Windows Can’t Connect To This Network”. Usually, this type of error doesn’t explain much about the root cause.
Based on our experience, there are several steps to fix this issue.
1. Verify that the problem is your windows
If you can’t connect your Windows 10 computer or tablet to wireless, check to see if you can connect any of your other devices to the same network [1].
Then, try to reboot your network device (e.g. modem or router). Or, if you use the phone’s internet as a hotspot, try to restart that phone.
If other devices have no problem connecting to the network after you restart your network device, we can say that your windows 10 is the main issue. Then we can go to the next step below.
2. Fixing your windows 10 connection issue
There are several things you can do to solve the “Windows Can’t Connect To This Network” problem:
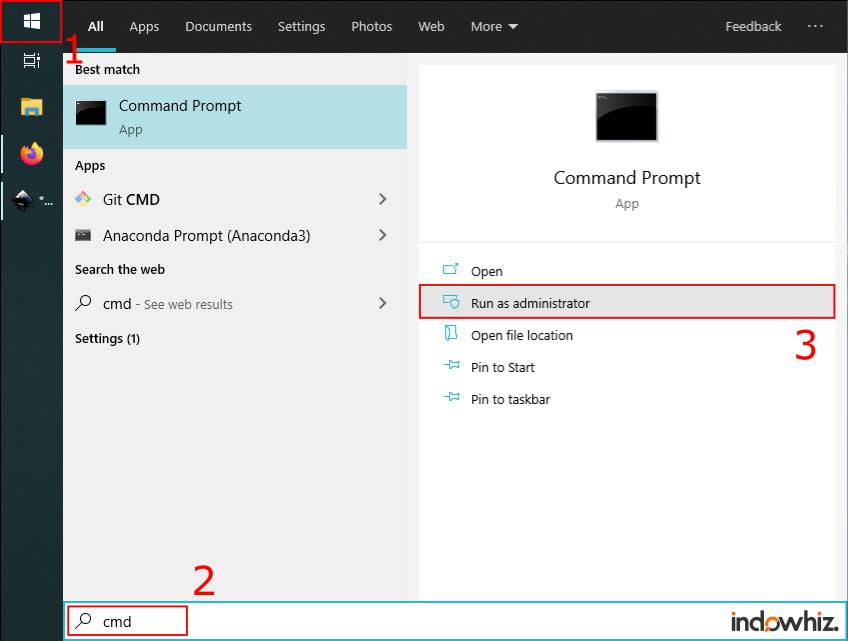
Step 1: Run CMD as administrator
- You can click the windows icon
- then type “
cmd” directly, - then you can click
Run as Administrator, - it may ask for your administrator password, before it can open the command prompt.
Step 2: Open device manager
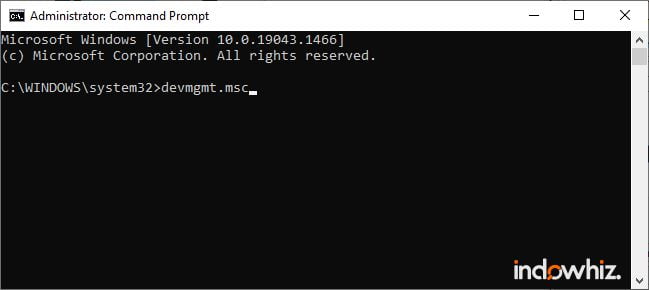
Open the device manager by typing “devmgmt.msc” in the CMD, then press enter [2].
This will open the device manager in administrator mode, to allow you to make any changes.
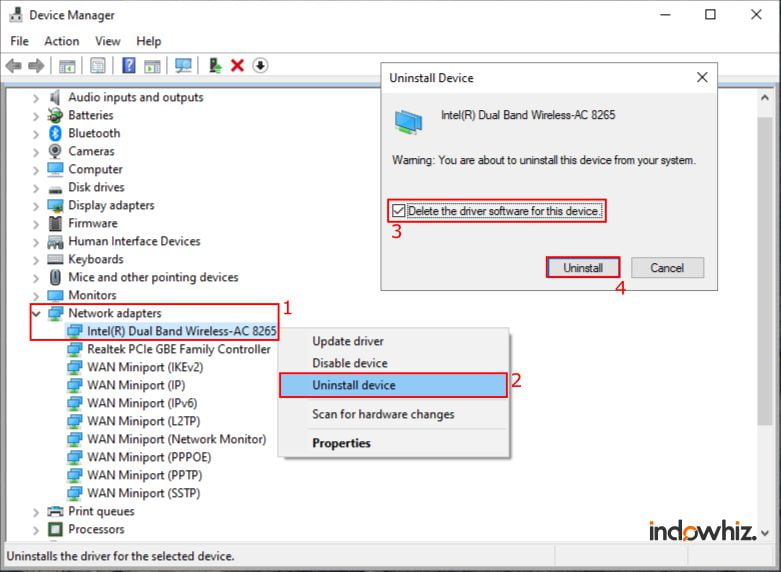
Step 3: Uninstall your Wi-Fi driver
Some Wi-Fi settings may be incorrect or corrupted. So, we need to uninstall the current Wi-Fi driver, and reinstalled it later.
To uninstall your Wi-Fi:
- In the device manager, double-click
Network Adapters, then find and right-click your Wi-Fi device name, - click
uninstall device, - then, in the uninstallation confirmation box, check the
Delete the driver software for this deviceoption, - then click
Uninstall.
Step 4: Reinstall your Wi-Fi driver
- In the device manager, click
Network Adapters, - then click the
Scan for hardware changesicon in the icon bar, or you can find it in theActionmenu >Scan for hardware changes.
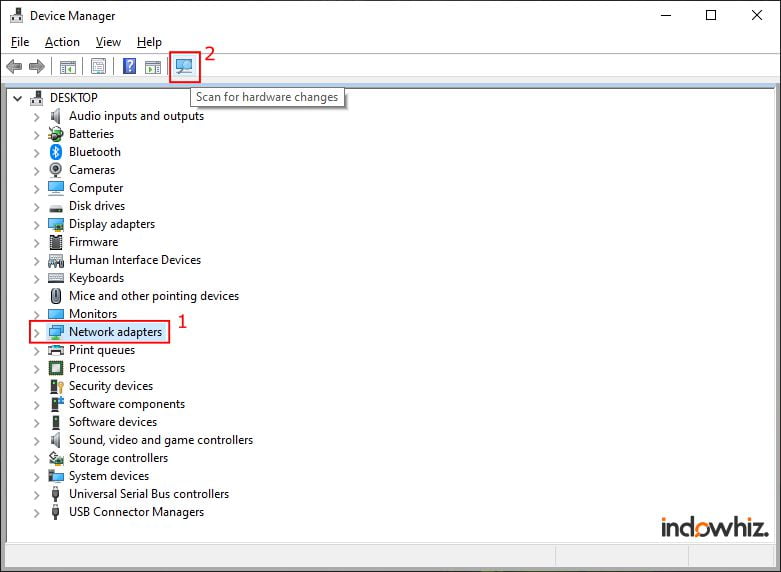
Windows will detect the missing driver for your Wi-Fi and reinstall it automatically [3]. Commonly, in normal cases, your Wi-Fi device should reappear in the network adapters list.
If you can’t find your Wi-Fi device name in the network adapters list, then you need to install the driver manually. You may download it from its manufacturer’s website.
Step 5: Update your Wi-Fi driver
Before we continue, try to connect your Wi-fi to your network. If it still failed to connect, then try to update the driver as follows:
- In the device manager, double-click
Network Adapters, then find and right-click your Wi-Fi device name, - click
Update driver,
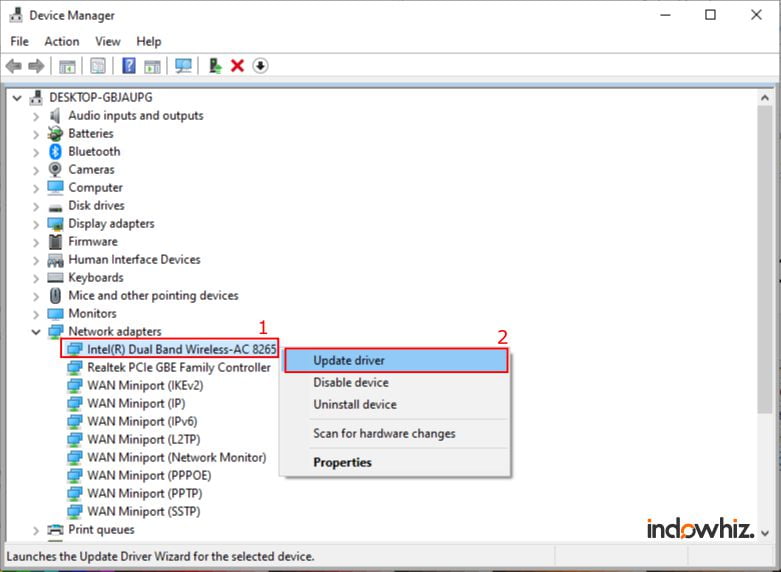
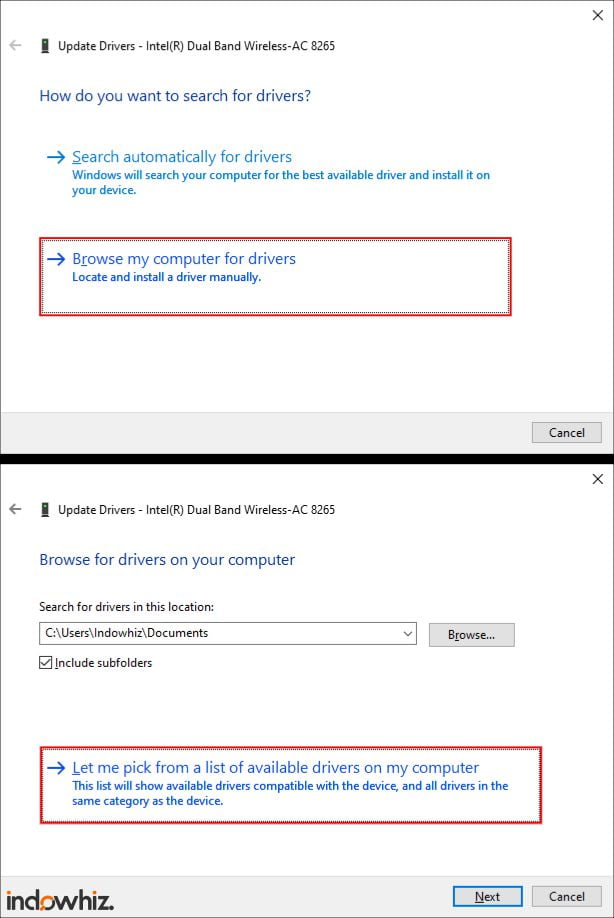
- select
Browse my computer for drivers, - then, select
Let me pick from a list of available drivers on my computer,
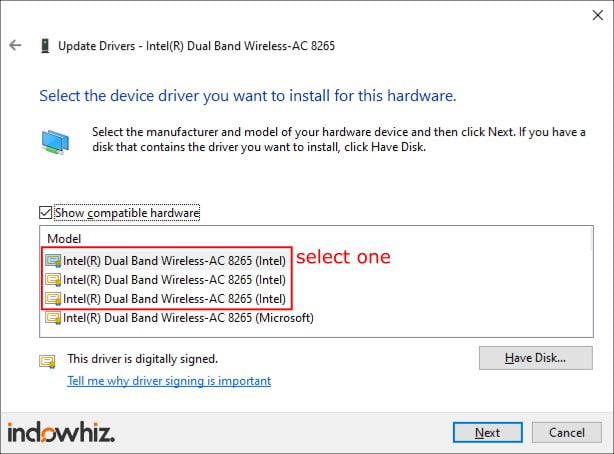
- select a driver from its original manufacturer (other than Microsoft).
- then click
Next,
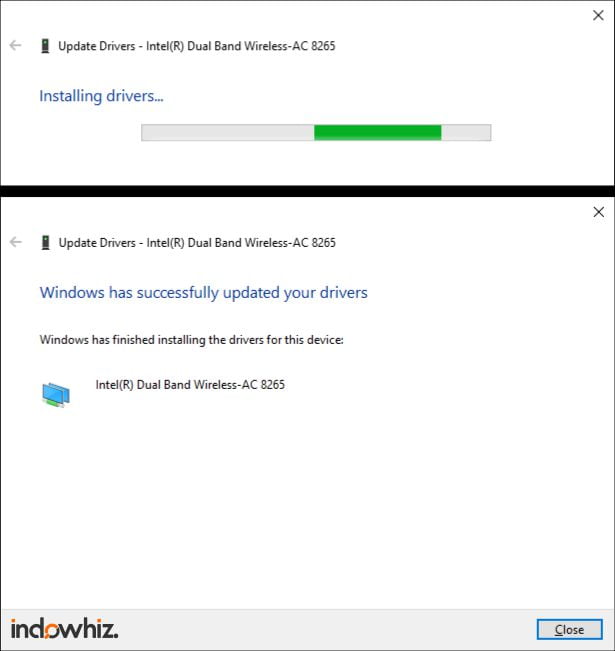
- Windows will update the drivers, after it finished, click
Close.
Finally, try to re-connect your Wi-fi to your network. We hope that it can solve your connection issue.
References
- [1]B. Stephenson, “What to Do When Windows 10 Can’t Connect to a Network,” Lifewire, Dec. 20, 2021. https://www.lifewire.com/what-to-do-when-windows-10-can-t-connect-to-a-network-4587251 (accessed Feb. 04, 2022).
- [2]T. Fisher, “How to Access Device Manager From the Command Prompt,” Lifewire, Nov. 10, 2020. https://www.lifewire.com/how-to-access-device-manager-from-the-command-prompt-2626360 (accessed Feb. 04, 2022).
- [3]J. Zeng, “How to reinstall Wi-Fi driver on windows 10 [Easily],” Driver Easy, Nov. 13, 2018. https://www.drivereasy.com/knowledge/how-to-reinstall-wi-fi-driver-on-windows-10-easily/ (accessed Feb. 04, 2022).
