You may have set the Windows to display a language that uses Latin characters (e.g., English, French, and Indonesian). Then, displaying non-Latin filenames (e.g., Chinese, Korean, and Japanese) might cause problems. For example, if I have filenames in Chinese, such as 中文文件名.docx. Windows Explorer may display it similar to either ������W.docx or ñññσñσÑ≤ªW.docx.
To fix this behavior, try the following steps. Although we use the case of Chinese characters, this method should also work in other non-Latin characters (e.g., Arabic, Korean, and Japanese).
A. Windows limitations
As in our experience, any setting modifications in Section B cannot automatically change the display name of the existing files, as in Fig 1. In addition, we have not found any third-party software that can change the “unreadable” characters to the correct language characters.
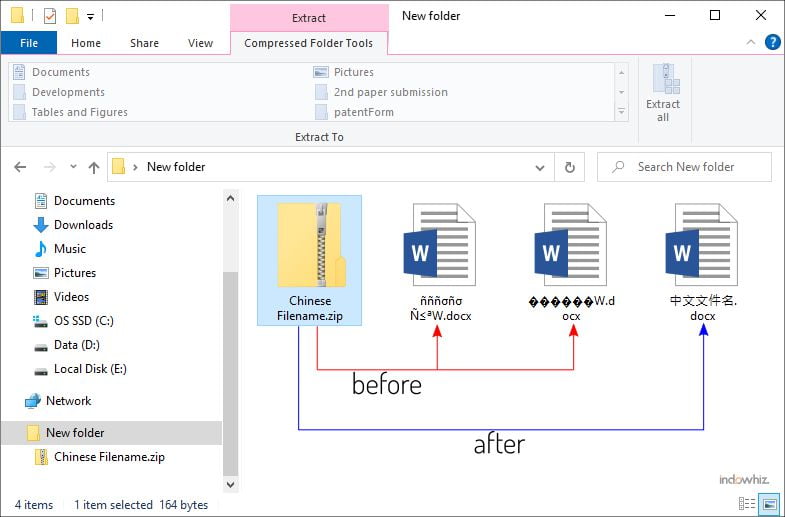
Therefore, there is a way to know whether or not you succeeded in setting up your Windows.
- You need a file from another computer in the corresponding language, which displays its filename correctly.
- Archive the file in a *.zip format to preserve its settings.
You can use this *.zip file to validate the settings modifications. After you change any settings in Section B, open the zip to see whether your Windows can correctly display the filename.
B. Change Windows settings
Method 1: Change language settings
Installing language
Before you can change the display, prior install the respective language as follows [1], [2]:
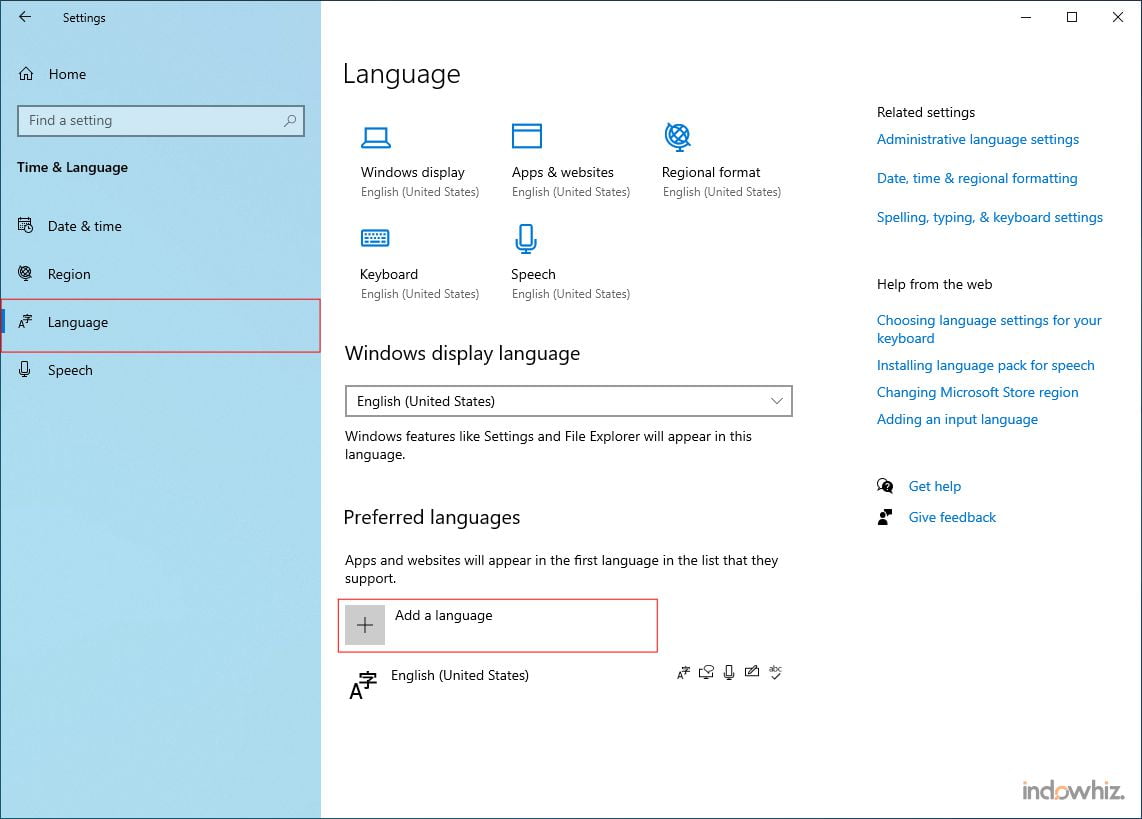
- go to Windows Settings or press the
Windows key + X, and selectSettings, - click
Time & Language, and then click onLanguage, - under the
Languagesettings, you will find the list of installed languages in thePreferred languages, as in Fig 2, - if you cannot find the required language (e.g., Chinese), you need to install it by clicking
Add a language. Otherwise, skip steps 4 to 6,
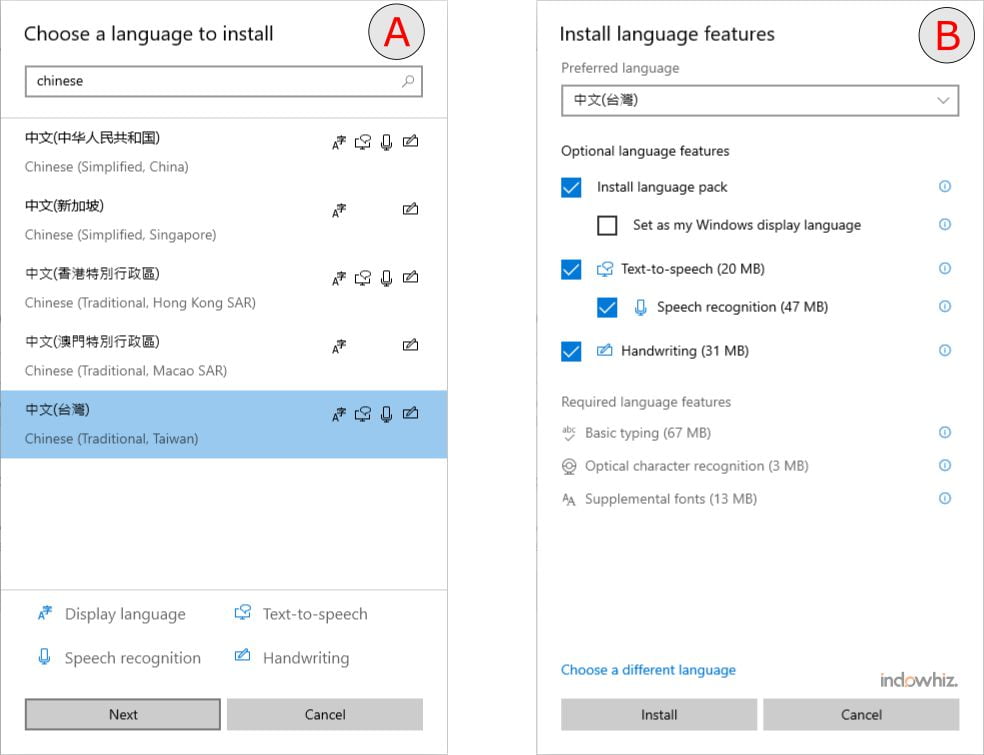
- find the required language name, then click
Next, as in Fig 3-A, - click all the required features, as in Fig 3-B.
Note: you can un-check theSet as my Windows display languageoption if you don’t want to change the primary language.
Changing language
After you install the corresponding language, you will return to the language settings page, as in Fig 2. To display non-Latin characters, there are several choices:
- Option 1: Change the
display language.
This option will change all the Windows displays, including Taskbar, Start, File Explorer, and Settings. To change thedisplay language, do as follows:- as in Fig 2, under the
Languagesettings, select a language from the list, - click
OK.
- as in Fig 2, under the
- Option 2: Change the
system locale.
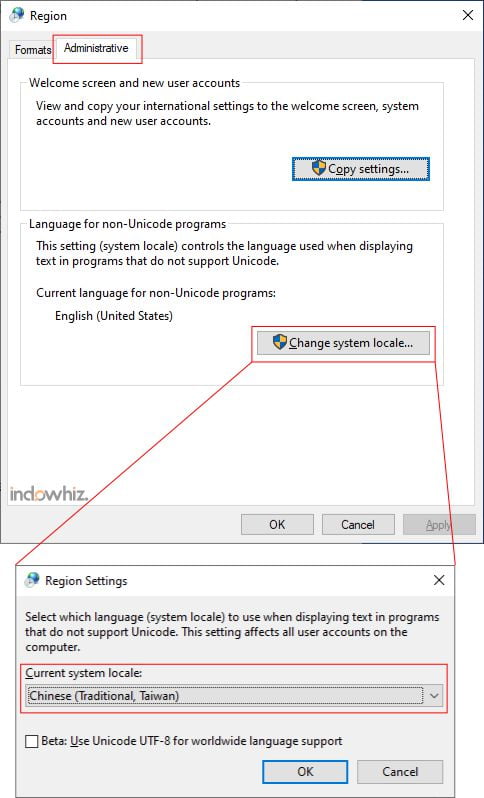
This option will not change thedisplay languagebut only changes the default character set (letters, symbols, and numbers) and font for non-Unicode programs. To change thesystem locale- as in Fig 2, under the
Related settings, clickAdministrative language settings, - under the
Administrativetab, clickChange system locale..., as in Fig 4, - change the
system locale - click
OK, - restart the computer.
- as in Fig 2, under the
- Option 3: Change both
display languageandsystem locale.
If neither option 1 nor 2 could solve our issue, try to change both thedisplay languageand thesystem localeto the corresponding language.
Method 2: Install and unhide fonts
If changing the language settings does not help, try to change the font settings. There are two options, unhide the fonts [3] and download fonts for all languages [4].
Option 1: Unhide the fonts
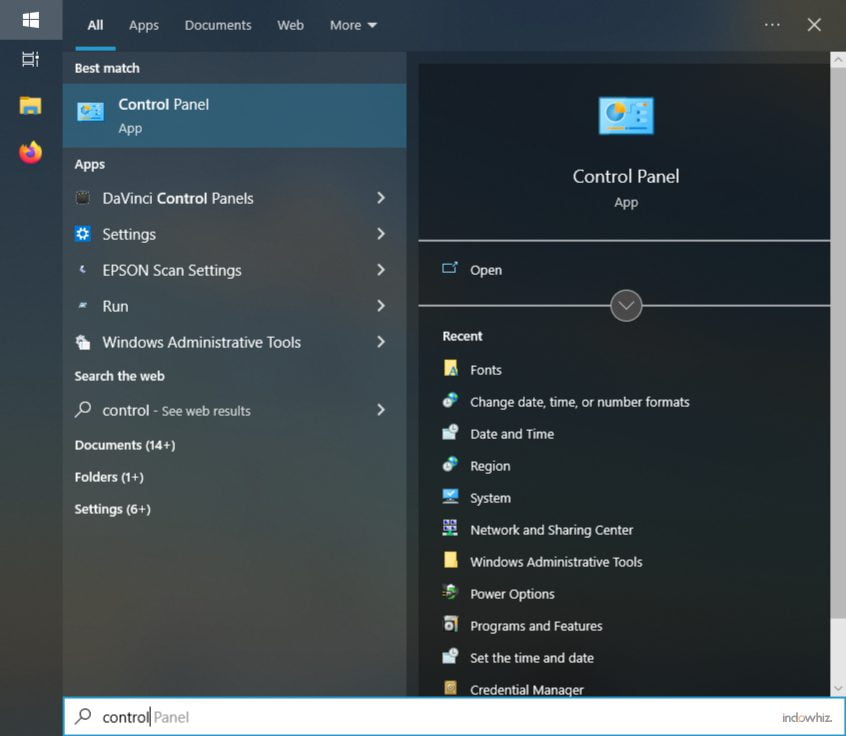
- Click the Start menu in the taskbar or Press the
Windows key, - then directly type
Control Panel, and clickOpen, as in Fig 5,
- under the
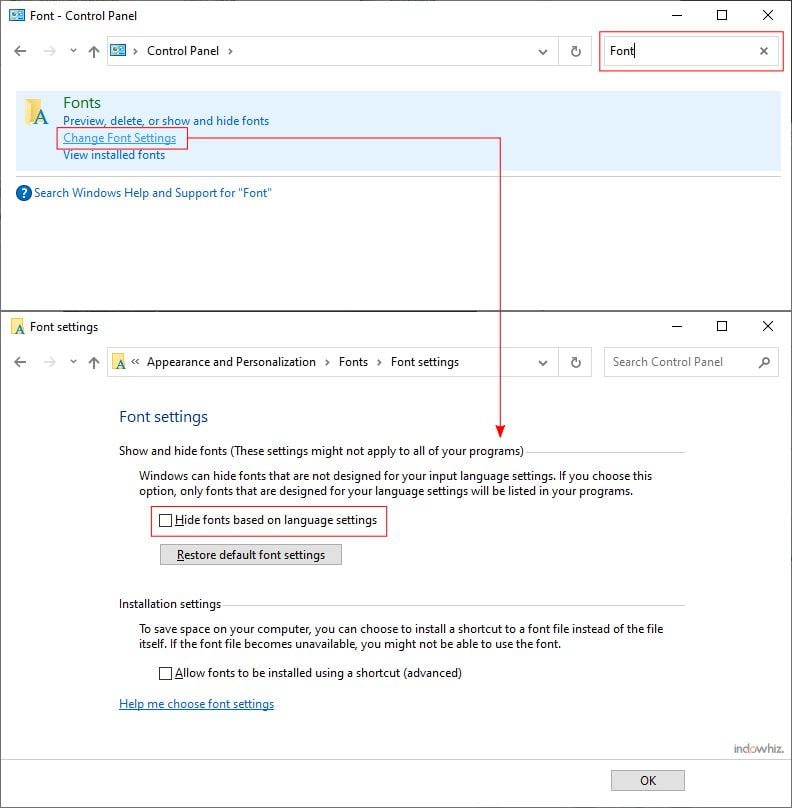
Control Panel, typefontin the search box (upper right), - then select
Change Font Settings, - un-tick the option
Hide fonts based on language settings, as in Fig 6, - click
OK.
Option 2: Download fonts for all languages
Make sure that you have tried other options to no avail. Downloading fonts for all languages requires a considerable storage space (up to several hundreds of MB), and do as follows:
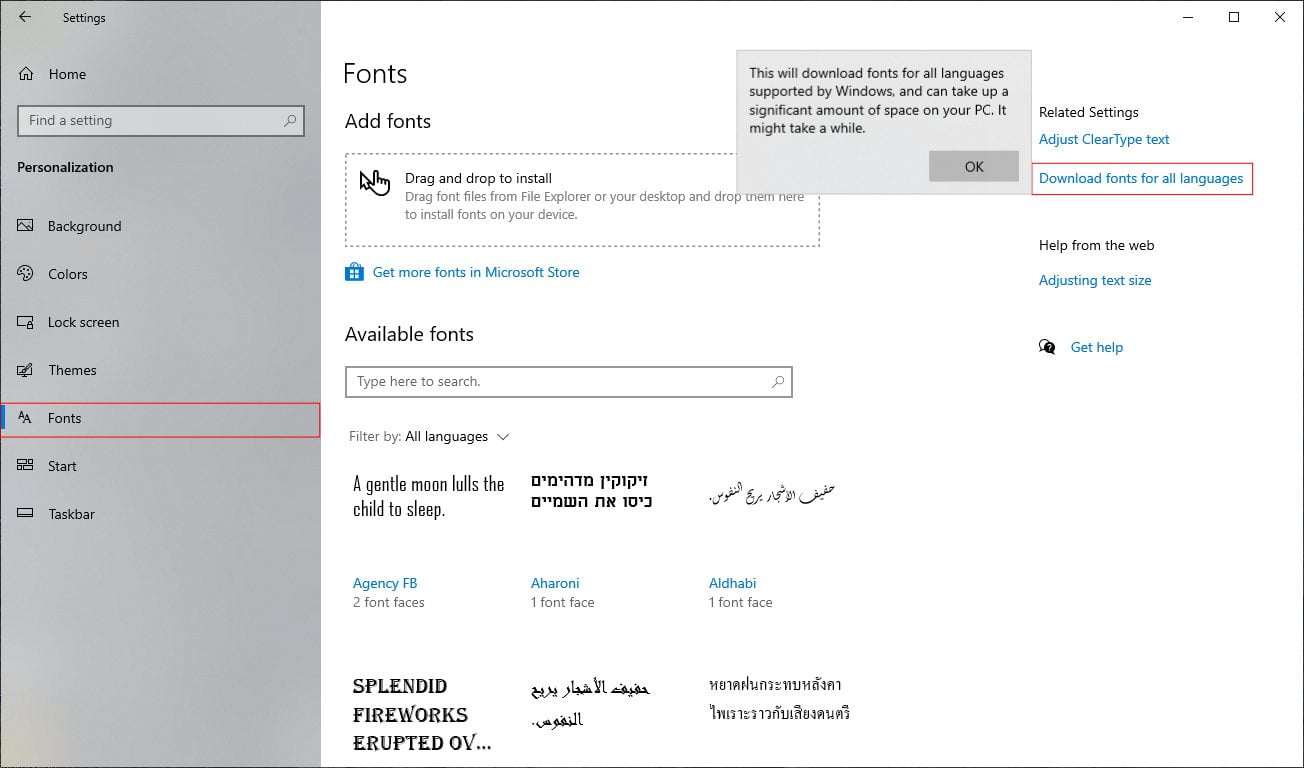
- go to Windows Settings or press
Windows key + X, and selectSettings, - click
Personalization, and then click onFonts, - under
Related Settings, clickDownload fonts for all languages, as in Fig 7, - when a message pops up about requiring a significant amount of space, click
OK, - wait for the windows to download all the necessary fonts.
References
- [1]M. Huculak, “How to change system language on Windows 10,” Windows Central, Apr. 12, 2022. https://www.windowscentral.com/how-properly-change-system-default-language-windows-10 (accessed Oct. 20, 2022).
- [2]ASUSTeK Computer Inc., “[Windows 11/10] Change System Language,” ASUS: Support, Mar. 15, 2022. https://www.asus.com/support/FAQ/1030002/ (accessed Oct. 20, 2022).
- [3]Z. Falak, “How to Customize Fonts in Windows 11,” makeuseof.com, Jul. 09, 2022. https://www.makeuseof.com/windows-11-customize-fonts/ (accessed Oct. 20, 2022).
- [4]L. Whitney, “How to Manage Your Fonts in Windows,” PCMag, May 12, 2022. https://www.pcmag.com/how-to/how-to-manage-your-fonts-in-windows (accessed Oct. 20, 2022).


